
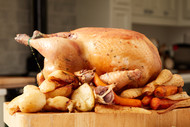
Your complete guide to carving a turkey at home
Posted by Copas Farm Shop on 22nd Jul 2026
Carving a turkey at home means resting the cooked bird for at least 30–45 minutes, then removing the legs and wings before slicing the breast meat cleanly against the grain. Done in the right order, with a sharp knife and a steady board, the whole process takes around 15 minutes and produces neat, generous slices with far less waste than rushing it at the table.
Key takeaways
- Rest your turkey for a minimum of 30 minutes after it comes out of the oven — larger birds (5 kg and above) benefit from up to 45 minutes.
- You will need two tools: a long, sharp carving knife (at least 20 cm blade) and a sturdy carving fork or pair of kitchen tongs.
- Remove the legs and thighs first, then the wings, then slice the breast — always carve off the bird, not on it.
- Carving against the grain of the muscle produces shorter fibres and noticeably more tender slices.
- At Copas, we find that dry-aged, slow-grown birds hold their juices better during carving — you lose less moisture to the board.
- A properly rested and carved 5 kg turkey yields around 8–10 generous portions, with enough for leftovers.
What equipment do you need to carve a turkey at home?
You need a long carving knife, a carving fork or tongs, a large chopping board, and a warm serving platter. That is the full list — nothing specialist, nothing expensive.
The knife matters most. A blade of at least 20 cm gives you the length to slice across the full width of the breast in one clean stroke. A short or serrated knife drags and tears. If your knife needs sharpening, do it the night before — a blunt knife is the single most common reason for ragged, uneven slices.
A large, heavy chopping board with a groove or well around the edge catches the juices. If yours has no groove, place a folded damp cloth beneath it to stop it sliding. Warm your serving platter in a low oven (around 60°C) while the turkey rests, so the sliced meat doesn't cool too fast once it's carved.
How long should you rest a turkey before carving?
Rest a turkey for at least 30 minutes after removing it from the oven, uncovered or loosely tented with foil. Birds above 5 kg should rest for 40–45 minutes.
Resting allows the muscle fibres to relax and reabsorb juices that have been driven to the centre of the bird by the heat. Cut too soon and those juices run straight onto the board rather than staying in the meat. The internal temperature will hold well above a safe 75°C during this window, so there's no food-safety risk in waiting.
A common concern is that the bird will go cold. In practice, a whole turkey retains heat for longer than most people expect. If your kitchen is warm and the bird is tented with foil, the internal temperature drops very slowly. Serving slightly less than piping hot is a worthwhile trade for noticeably juicier meat.
How to carve a turkey at home: step by step
Carve in this order — legs first, then wings, then the breast. Working in sequence keeps the bird stable and means you're never cutting around awkward angles.
- Place the bird breast-side up on your chopping board, with the legs pointing toward you. Make sure the board is secure and isn't sliding.
- Remove the leg and thigh. Pull the leg away from the body with your free hand or a fork. Use your knife to cut through the skin between the thigh and the breast, then push the leg outward until the hip joint pops. Slice through the joint — do not attempt to cut through bone. Repeat on the other side.
- Separate the drumstick from the thigh. Lay the leg flat, find the joint between drumstick and thigh, and cut cleanly through it. Slice the thigh meat off the bone in even pieces, cutting parallel to the bone.
- Remove the wings. Cut through the skin at the shoulder joint, press the wing outward and locate the joint, then slice through it. Wings can go straight to the platter or be reserved for stock.
- Carve the breast. Make a long horizontal cut along the base of the breast, parallel to the ribcage — this is your guide cut. Then carve downward slices from the top of the breast toward that guide cut, letting each slice fall away cleanly. Aim for slices around 5–8 mm thick.
- Check for the oyster. Flip the carcass over and you'll find two small, round pockets of meat sitting in the curve of the pelvis — the oysters. These are the most flavoursome pieces on the bird. Ease them out with a spoon or your fingers and add them to the platter.
- Transfer and serve. Arrange breast slices, thigh meat, and drumsticks on your warmed platter. Spoon over any resting juices from the board and serve promptly.
How do you carve turkey legs and thighs cleanly?
Carve turkey legs and thighs by separating them at the hip joint rather than cutting through bone, then slicing the thigh meat parallel to the bone. The joint releases cleanly once the hip socket is popped — no sawing or force required.
Dark meat on the leg and thigh is denser and benefits from being sliced against the grain, just like the breast. The fibres in the thigh run roughly parallel to the femur bone, so cut across that direction for shorter, more tender pieces. Drumstick meat is trickier to carve neatly — most people simply serve the drumsticks whole, which is perfectly practical for a family table.
Notably, Copas birds are slow-grown over a longer season than standard supermarket turkeys, which means the leg muscle is more developed and the dark meat has a deeper flavour. It holds its texture well when carved and reheats reliably the next day.
How do you carve turkey breast without it drying out?
Slice the breast only when you're ready to serve, not in advance. Pre-sliced breast dries out within minutes. Carve it in portions as needed if the table is eating in stages.
The guide cut along the base of the breastbone is the practical key here. Without it, each downward slice tends to drag and compress the meat beneath, making thinner slices harder to achieve. With the guide cut in place, each slice separates cleanly without pressure.
Keep your strokes long and smooth rather than sawing. A single long pull of the knife produces a cleaner surface than several short strokes, which creates micro-tears that release moisture faster. If juices pool on the board while you carve, spoon them back over the sliced meat — don't discard them.
Carving knife vs. chef's knife vs. electric knife: which should you use?
| Option | Best for | Approximate cost | Limitation |
|---|---|---|---|
| Long carving knife (20 cm+) | Clean breast slices, all-round carving | £30–£90 | Requires a sharp edge to perform well |
| Chef's knife (20–25 cm) | Home cooks who already own one | £0 (already owned) | Wider blade makes thin breast slices harder |
| Boning knife | Separating joints, removing thigh meat | £20–£50 | Too short for long breast strokes |
| Electric carving knife | Speed, minimal knife skill required | £20–£60 | Can shred rather than slice if blade is blunt |
A good carving knife, kept sharp, is the right tool for most households. A chef's knife is an acceptable substitute if it's long and genuinely sharp. Electric knives are useful for those who find long manual cuts difficult, but they produce a less clean result on a well-rested, properly dry-aged bird where the texture rewards a single clean stroke.
What are the most common mistakes when carving a turkey?
Carving too early. Not resting the bird long enough is the most frequent error. Even 15 extra minutes of resting makes a visible difference to how much juice stays in the meat versus runs onto the board.
Trying to carve at the table. This is traditional but impractical. The bird shifts, the angles are awkward, and guests wait longer for unevenly cut meat. Carve in the kitchen, arrange on a warm platter, and bring it to the table properly presented.
Cutting through bone instead of joints. A knife through bone creates splinters, damages the blade, and produces ragged edges. Every major joint on a turkey — hip, shoulder, drumstick-thigh — releases cleanly when you find the socket and apply lateral pressure rather than force.
Using a blunt knife. A blunt blade compresses the meat, tears the skin, and makes thin, even slices nearly impossible. Sharpen or hone the blade before you start.
How do you carve a turkey if it's your first time?
If this is your first time carving a turkey, start with the legs — they're the most forgiving cut and a good way to build confidence before you move to the breast. Watch for the joint, apply outward pressure, and let the knife follow the natural socket rather than forcing through.
A 4–5 kg bird is the most manageable size for a first carve. Copas's free-range turkeys are available in a range of sizes, and for smaller households a 4–5 kg bird carves comfortably within 10–12 minutes once you've done it once or twice.
The single most useful thing a first-time carver can do is watch the process through once before attempting it. Set up everything — board, knife, warm platter, a bowl for the carcass — before the bird comes out of the oven. Preparation removes almost all the anxiety.
What do you do with the turkey carcass after carving?
Use the carcass for stock within 24 hours, or freeze it in a sealed bag for up to 3 months. A turkey carcass produces several litres of rich stock that forms the base of soups, gravies, and risottos.
To make stock, place the carcass in a large pot, cover with cold water, add a halved onion, a few peppercorns, a bay leaf, and a stick of celery. Simmer uncovered for 3–4 hours, then strain and cool. Skim the fat from the surface once it has chilled. The resulting stock will gel when cold — that's the sign of a high-collagen, well-made stock.
Any leftover carved meat should be stored separately from the carcass, in a sealed container in the fridge, and eaten within 3 days. Carved turkey reheats well at 180°C for 15–20 minutes if covered with foil to retain moisture.
How do you choose a turkey that's worth carving well?
A turkey worth carving well is one that has been slow-grown, dry-aged, and properly rested before cooking — the preparation before it reaches your kitchen shapes how it carves and tastes as much as anything you do at home.
Slow-grown birds have denser, better-structured muscle. In our work with Copas birds, we raise them over a longer season with full access to pasture — the kind of growth rate that gives the breast meat the texture to hold together cleanly under the knife rather than compressing or tearing. Standard commercial birds, grown quickly in intensive conditions, have a softer, wetter muscle structure that carves with noticeably less definition.
Dry-ageing removes surface moisture before the bird reaches you, which concentrates flavour and means less liquid is lost to the board during carving. If you've ever had a pool of thin, pale liquid collect under your turkey while you carve, the bird hasn't been dry-aged. Browse Copas's turkey range to see the full selection, sized from around 4 kg for a smaller gathering right up to table centrepieces for 12 or more.
Frequently Asked Questions
How long should a turkey rest before carving? A turkey should rest for at least 30 minutes after coming out of the oven. Birds over 5 kg benefit from 40–45 minutes. Resting allows muscle fibres to reabsorb juices, and the bird stays hot enough to eat comfortably throughout this window without any food-safety risk.
What's the best knife to carve a turkey? A long carving knife with a blade of at least 20 cm is the best tool for carving a turkey. It gives you the reach to slice cleanly across the full width of the breast in a single stroke. A sharp chef's knife of similar length is a workable alternative. A blunt or short knife produces torn, uneven slices.
Should you carve a turkey at the table or in the kitchen? Carve in the kitchen, then transfer to a warm platter for the table. Carving at the table looks traditional but the angles are awkward, the bird shifts on the plate, and guests wait longer for unevenly cut pieces. A platter presented at the table looks as good and keeps the meat warmer.
How do you stop turkey breast drying out when carving? Slice the breast only as you're ready to serve — don't carve it in advance. Use a single long knife stroke per slice rather than sawing, which tears the surface and causes moisture loss. Spoon any resting juices from the board back over the sliced meat before serving.
Where is the oyster on a turkey? The oysters are two small, round pockets of dark meat set into the back of the carcass, one on each side, sitting in the curve of the pelvic bone. Flip the carcass over after carving the breast and ease them out with a spoon or your fingers. They are the most flavoursome pieces on the bird.
How many people does a 5 kg turkey feed? A 5 kg oven-ready turkey feeds 8–10 people generously when properly carved, with enough for leftovers. A 4 kg bird suits 6–8 people. The key variable is carving technique — a well-rested, neatly sliced bird produces significantly more usable meat than one carved straight from the oven.
Can you carve a turkey the day before? You can carve a turkey the day before if you're managing a large gathering and need to plan ahead. Store sliced meat in a sealed container in the fridge and reheat covered with foil at 180°C for 15–20 minutes. The texture is slightly less ideal than freshly carved, but the result is still good if the bird was high quality to begin with.
What do you do if you cut through the bone by mistake? If you cut through a bone rather than a joint, check the meat around that area for any bone fragments before plating. Remove any visible splinters and set that piece of meat aside as your own portion. Going forward, locate the joint by pressing the leg or wing outward until you feel or hear the socket release — cut there, not through the bone itself.