
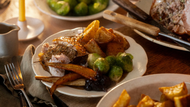
How to carve a Turkey
Posted by Copas Farm Shop on 3rd Sep 2026
Rest the turkey for at least 30–45 minutes after roasting, tented loosely with foil. Then remove the legs and thighs first, followed by the wings. Slice the breast meat downward against the grain in smooth, even cuts. Work from the breastbone outward. The whole process takes under 15 minutes with a sharp knife.
Key takeaways
- A whole turkey needs to rest for a minimum of 30 minutes before carving — larger birds (over 6kg) benefit from up to 45 minutes, giving the juices time to redistribute through the meat.
- Always carve against the grain: breast slices cut perpendicular to the muscle fibres stay together and hold more moisture than slices cut with the grain.
- Remove the legs before you carve the breast — it gives you a clear, flat surface and makes clean slices far easier.
- A long, thin-bladed carving knife outperforms a standard cook's knife for breast meat; a pair of kitchen scissors is the quickest way to separate the joints.
- Resting and carving well can recover a turkey that seems dry straight out of the oven — it is the single most underrated step in the whole cook.
Why does resting matter before you carve?
Heat pushes the juices in any roasted meat toward the centre. When you carve a turkey too soon, those juices run straight onto the board and are lost. Resting allows the muscle fibres to relax and reabsorb the liquid, so every slice is moister. For a standard table bird, 30 minutes is the minimum; for a large bird over 6kg, give it 45.
Tent the turkey loosely with foil — not sealed tight. A tight wrap traps steam and softens the skin you worked hard to crisp, so loose foil is the better approach: it keeps the bird warm without wrecking the texture.
How do you actually carve a turkey, step by step?
- Transfer the rested turkey to a large, stable chopping board. Remove any trussing string.
- Pull the leg away from the body and cut through the skin at the joint. Press the leg outward until the hip joint pops, then cut cleanly through. Repeat on the other side.
- Separate the drumstick from the thigh by cutting through the knee joint. The thigh meat can be sliced off the bone or served whole.
- Locate the wishbone at the neck end and remove it if you haven't already done so before roasting — this makes breast carving significantly smoother.
- Carve the breast by running your knife along the breastbone, then slice downward in long, even strokes, working from the breastbone outward. Cut against the grain, not with it.
- Remove the wings last. Cut through the shoulder joint close to the body.
A sharp, long-bladed carving knife makes the biggest difference here. A blunt knife tears rather than cuts, which shreds the breast meat and wastes the edge you built through the cook.
What's the difference between carving at the table versus in the kitchen?
Carving at the table is a tradition, but it's genuinely harder to do well. The board is smaller, the light is lower, and there is an audience. For a clean result, carve in the kitchen, arrange the meat on a warmed platter, and bring it to the table ready to serve.
If table carving matters to the occasion, remove the legs and wings in the kitchen first, then carry the crown to the table and slice the breast there. It is a reasonable compromise — the dramatic moment survives, the meat suffers less.
How should you plate a carved turkey?
Arrange the breast slices in a slight fan across the centre of a warmed platter. Place the thigh meat and drumsticks at either end. Laying the slices slightly overlapping keeps them from drying out on the platter before everyone has served themselves.
Pour any resting juices from the board back over the sliced meat just before serving — it replaces what was lost to the board and adds flavour. Keep the platter in a low oven (around 60°C) if there's a gap between carving and sitting down.
Which turkey is worth carving properly in the first place?
Importantly, technique only goes so far. A slow-grown, well-rested bird with real depth of flavour is what makes carving worthwhile. At Copas Farm Shop, free-range turkeys are slow-grown and hand-plucked — the kind of bird that rewards patience at every stage, including the carving board. If you are sourcing your bird this year, it's worth looking at the full range of farm meats to plan the wider table.
Frequently Asked Questions
How long should a turkey rest before carving? At least 30 minutes for a standard bird, and up to 45 minutes for anything over 6kg. The resting period allows the juices to redistribute through the meat, so every slice is moister. Tent it loosely with foil to keep the heat in without steaming the skin soft.
Should you remove the wishbone before or after roasting? Before roasting, ideally. Removing the wishbone before the bird goes in the oven makes carving the breast significantly easier afterwards — the knife travels in a clean, unobstructed line along the breastbone.
Can you carve a turkey ahead of time? Yes. Carve the bird up to an hour ahead, arrange the slices on a warmed platter, and cover with foil. Spoon the resting juices over the meat before covering to keep moisture in. Reheat gently in a low oven (around 160°C) for 10–15 minutes if needed.
What do you do with the turkey carcass after carving? The carcass makes excellent stock. Cover it with cold water, add a halved onion, a couple of bay leaves and any leftover herbs, and simmer for two to three hours. Strain and reduce for a base that far outperforms anything from a carton.
Do you need a special knife to carve a turkey? You don't need a specialist carving knife, but a long, thin-bladed knife with a sharp edge makes a material difference to breast slices. A standard 20cm cook's knife will do the job, but you'll need to stop and resharpen it halfway through a large bird if it isn't already keen.